
目次
概要
こんにちは、テクニカルサポートの牛山です。
今回は、AWS AmplifyとAmazon Pinpointを使ってReactベースの静的ページをデプロイし、ページに対してユーザの行動分析をおこなっていこうと思います。
前置き
本題へ入る前にまず、今回使用するサービスについて概要程度に説明します。
| サービス名 | 概要 |
|---|---|
| AWS Amplify | モバイル・WEB開発に適した宣言型Javascriptライブラリを提供しインフラ側を気にすることなくアプリケーション実装に集中することができるようになります。 |
| Amazon Pinpoint | ユーザの動向を分析し、個別ユーザに対してマーケティング告知が打てるといったことができるサービスとなります。 |
| Gatsby.js | Reactベースのモダンで高速なサイトを作成できる静的サイトジェネレータです。 MITライセンスでパフォーマンス、スケーラビリティ、セキュリティがデフォルトで組み込まれているオープンソースフレームワークです。 |
それでは、実際に触っていきましょう。
手順
Node.jsのインストール
ここでは、Amazon Linux2インスタンスを用意して「AWS Amplify」の導入準備をおこないます。
前提条件として、インスタンスの準備はすでに完了し、コンソール画面に入っている状態とします。
Amazon Linux2でNode.jsのセットアップをおこなう場合、AWS側でインストールスクリプトを用意してくれているので今回はこれを使用します。
※ Node.jsインストールガイド
Node.jsをインストールすると一緒にnpmコマンドもついてきます。
最新バージョンのものがインストールされるようです。
[ec2-user@dev ~]$ sudo su -

[root@dev ~]# curl -o- https://raw.githubusercontent.com/nvm-sh/nvm/v0.34.0/install.sh | bash
  % Total    % Received % Xferd  Average Speed   Time    Time     Time  Current
                                 Dload  Upload   Total   Spent    Left  Speed
100 13226  100 13226    0     0  62093      0 --:--:-- --:--:-- --:--:-- 62093

[root@dev ~]# . ~/.nvm/nvm.sh

[root@dev ~]# nvm install node
Downloading and installing node v14.9.0...
Downloading https://nodejs.org/dist/v14.9.0/node-v14.9.0-linux-x64.tar.xz...
############################################################################################################################################################################### 100.0%
Computing checksum with sha256sum
Checksums matched!
Now using node v14.9.0 (npm v6.14.8)
Creating default alias: default -> node (-> v14.9.0)

[root@dev ~]# node -e "console.log('Running Node.js ' + process.version)"
Running Node.js v14.9.0

[root@dev ~]# npm --version
6.14.8
Amplify CLIツールのインストール
npmコマンドを使用してAmplifyのCLIをインストールします。
「npm install -g @aws-amplify/cli」でインストール後、「amplify --version」でバージョンが表示されれば無事に完了しています。
[root@dev ~]# npm install -g @aws-amplify/cli
npm WARN deprecated @graphql-toolkit/common@0.6.6: GraphQL Toolkit is deprecated and merged into GraphQL Tools, so it will no longer get updates. Use GraphQL Tools instead to stay up-to-date! Check out https://www.graphql-tools.com/docs/migration-from-toolkit for migration and https://the-guild.dev/blog/graphql-tools-v6 for new changes.
npm WARN deprecated @graphql-toolkit/common@0.9.7: GraphQL Toolkit is deprecated and merged into GraphQL Tools, so it will no longer get updates. Use GraphQL Tools instead to stay up-to-date! Check out https://www.graphql-tools.com/docs/migration-from-toolkit for migration and https://the-guild.dev/blog/graphql-tools-v6 for new changes.
npm WARN deprecated resolve-url@0.2.1: https://github.com/lydell/resolve-url#deprecated
npm WARN deprecated urix@0.1.0: Please see https://github.com/lydell/urix#deprecated
npm WARN deprecated core-js@2.6.11: core-js@<3 is no longer maintained and not recommended for usage due to the number of issues. Please, upgrade your dependencies to the actual version of core-js@3.
npm WARN deprecated graphql-import@0.7.1: GraphQL Import has been deprecated and merged into GraphQL Tools, so it will no longer get updates. Use GraphQL Tools instead to stay up-to-date! Check out https://www.graphql-tools.com/docs/migration-from-import for migration and https://the-guild.dev/blog/graphql-tools-v6 for new changes.
npm WARN deprecated request-promise@4.2.6: request-promise has been deprecated because it extends the now deprecated request package, see https://github.com/request/request/issues/3142
npm WARN deprecated request@2.88.2: request has been deprecated, see https://github.com/request/request/issues/3142
npm WARN deprecated har-validator@5.1.5: this library is no longer supported
/root/.nvm/versions/node/v14.9.0/bin/amplify -> /root/.nvm/versions/node/v14.9.0/lib/node_modules/@aws-amplify/cli/bin/amplify

> core-js@3.6.5 postinstall /root/.nvm/versions/node/v14.9.0/lib/node_modules/@aws-amplify/cli/node_modules/amplify-graphql-types-generator/node_modules/core-js
> node -e "try{require('./postinstall')}catch(e){}"

[root@dev ~]# amplify --version
Scanning for plugins...
Plugin scan successful
4.28.1
yarnコマンドのインストール
yarnコマンドもnpmコマンドと同様にパッケージ管理ツールでyarnコマンドの方が実行速度等、早い特徴がありますのでコマンドのインストールを下記コマンドでおこないます。
[root@dev starter-blog]# npm install -g yarn
/root/.nvm/versions/node/v14.9.0/bin/yarn -> /root/.nvm/versions/node/v14.9.0/lib/node_modules/yarn/bin/yarn.js
/root/.nvm/versions/node/v14.9.0/bin/yarnpkg -> /root/.nvm/versions/node/v14.9.0/lib/node_modules/yarn/bin/yarn.js
+ yarn@1.22.5

added 1 package in 0.362s
[root@dev starter-blog]# yarn -v
1.22.5
Gatsby.jsのCLIツールをインストール
Gatsby.jsのCLIツールをインストールし、Gatsby.jsプロジェクトを作成できるようにします。
今回は、Gatsby.js公式のスターターキットを使用します。
それぞれ下記コマンドを使用します。
[root@dev app]# npm install -g gatsby-cli
npm WARN deprecated @hapi/joi@15.1.1: joi is leaving the @hapi organization and moving back to 'joi' (https://github.com/sideway/joi/issues/2411)
npm WARN deprecated @hapi/bourne@1.3.2: This version has been deprecated and is no longer supported or maintained
npm WARN deprecated @hapi/address@2.1.4: This version has been deprecated and is no longer supported or maintained
npm WARN deprecated @hapi/topo@3.1.6: This version has been deprecated and is no longer supported or maintained
npm WARN deprecated @hapi/hoek@8.5.1: This version has been deprecated and is no longer supported or maintained
npm WARN deprecated core-js@2.6.11: core-js@<3 is no longer maintained and not recommended for usage due to the number of issues. Please, upgrade your dependencies to the actual version of core-js@3.
/root/.nvm/versions/node/v14.9.0/bin/gatsby -> /root/.nvm/versions/node/v14.9.0/lib/node_modules/gatsby-cli/cli.js

> core-js@2.6.11 postinstall /root/.nvm/versions/node/v14.9.0/lib/node_modules/gatsby-cli/node_modules/core-js
> node -e "try{require('./postinstall')}catch(e){}"

Thank you for using core-js ( https://github.com/zloirock/core-js ) for polyfilling JavaScript standard library!
・
・
・
+ gatsby-cli@2.12.91
added 863 packages from 622 contributors in 42.782s

[root@dev app]# gatsby new starter-blog https://github.com/gatsbyjs/gatsby-starter-blog
lqqqqqqqqqqqqqqqqqqqqqqqqqqqqqqqqqqqqqqqqqqqqqqqqqqqqqqqqqqqqqqqqqqqqqqqqk
x                                                                        x
x   Gatsby collects anonymous usage analytics                            x
x   to help improve Gatsby for all users.                                x
x                                                                        x
x   If you'd like to opt-out, you can use gatsby telemetry --disable   x
x   To learn more, checkout https://gatsby.dev/telemetry                 x
x                                                                        x
mqqqqqqqqqqqqqqqqqqqqqqqqqqqqqqqqqqqqqqqqqqqqqqqqqqqqqqqqqqqqqqqqqqqqqqqqj
info Creating new site from git: https://github.com/gatsbyjs/gatsby-starter-blog.git
・
・
・
Your new Gatsby site has been successfully bootstrapped. Start developing it by running:

  cd starter-blog
  gatsby develop
スターターキットブログの編集およびビルド
先ほど、「gatsby new」でスターターキットブログをダウンロードしてきました。
直後の下記のような形になっていると思います。
[root@dev test]# ls -1
starter-blog
「cd starter-blog」でstarter-blogのディレクトリに移動します。
すると下記の様なディレクトリ構成になっていることがわかると思います。
[root@dev starter-blog]# ls -1a
.cache
.git
.gitignore
.prettierignore
.prettierrc
LICENSE
README.md
content
gatsby-browser.js
gatsby-config.js
gatsby-node.js
node_modules
package-lock.json
package.json
public
src
static
上記、「content/blog/」配下に新しく「vi content/blog/hoge.md」とコマンドを打ち込んでEnterを押し、下記の様な形で記述し保存してください。
---
title: ようこそ!Gatsbyの世界へ!
date: 2020-09-03
---

# ようこそ!Gatsbyの世界へ!

> Hello World!
starter-blog直下で「npm install」を実行しプロジェクトに必要なものをインストールします。
[root@dev starter-blog]# npm install
npm WARN @pmmmwh/react-refresh-webpack-plugin@0.3.3 requires a peer of react-refresh@^0.8.2 but none is installed. You must install peer dependencies yourself.
npm WARN acorn-dynamic-import@4.0.0 requires a peer of acorn@^6.0.0 but none is installed. You must install peer dependencies yourself.
npm WARN gatsby-interface@0.0.166 requires a peer of gatsby@2.6.0 but none is installed. You must install peer dependencies yourself.
npm WARN gatsby-interface@0.0.166 requires a peer of react@16.8.1 but none is installed. You must install peer dependencies yourself.
・
・
・
audited 2471 packages in 13.565s

172 packages are looking for funding
  run npm fund for details

found 42 low severity vulnerabilities
  run npm audit fix to fix them, or npm audit for details
上記、完了後、「npm run build」コマンドで静的なWEBページを作成するためにビルドをおこないます。
完了すると下記の様に出力されます。
※「ビルドはstarter-blog直下でおこなうようにしてください。」
[root@dev starter-blog]# npm run build

> gatsby-starter-blog@0.1.0 build /var/www/vhosts/test/starter-blog
> gatsby build
・
・
・
success run page queries - 0.020s - 1/1 48.89/s
success write out requires - 0.005s
success Building production JavaScript and CSS bundles - 3.069s
success Building static HTML for pages - 1.075s - 8/8 7.44/s
success onPostBuild - 0.018s
info Done building in 9.362738729 sec
上記ビルド後、下記ディレクトリに静的なhtmlファイルが生成されていることが確認可能です。
[root@dev starter-blog]# ls -la public/hoge/
合計 32
drwxr-xr-x  2 root root    24  9月  3 02:10 .
drwxr-xr-x 11 root root  4096  9月  3 02:10 ..
-rw-r--r--  1 root root 27648  9月  3 02:10 index.html
Amplifyを設定する
Amplifyをプロジェクトに導入するため、Amplify CLIからAWSのバックエンドを構築できるようにするため、IAMユーザの作成と認証情報の作成をおこないます。
こちらも、「starter-blog」直下で下記コマンドを実行すると対話形式で設定内容がきかれますので最初の「AWS Region」は筆者の場合、東京リージョンなので「ap-northeast-1」を下矢印キーで選びあとはデフォルトを選んでおけば大丈夫です。
IAMユーザを作成するため、対話途中でIAMユーザ作成のリンクが生成されますのでこのリンクをコピーしてAWSの管理者アカウントでログインした状態の時に、コピーしたリンクをブラウザのURL欄に貼り付けアクセスします。
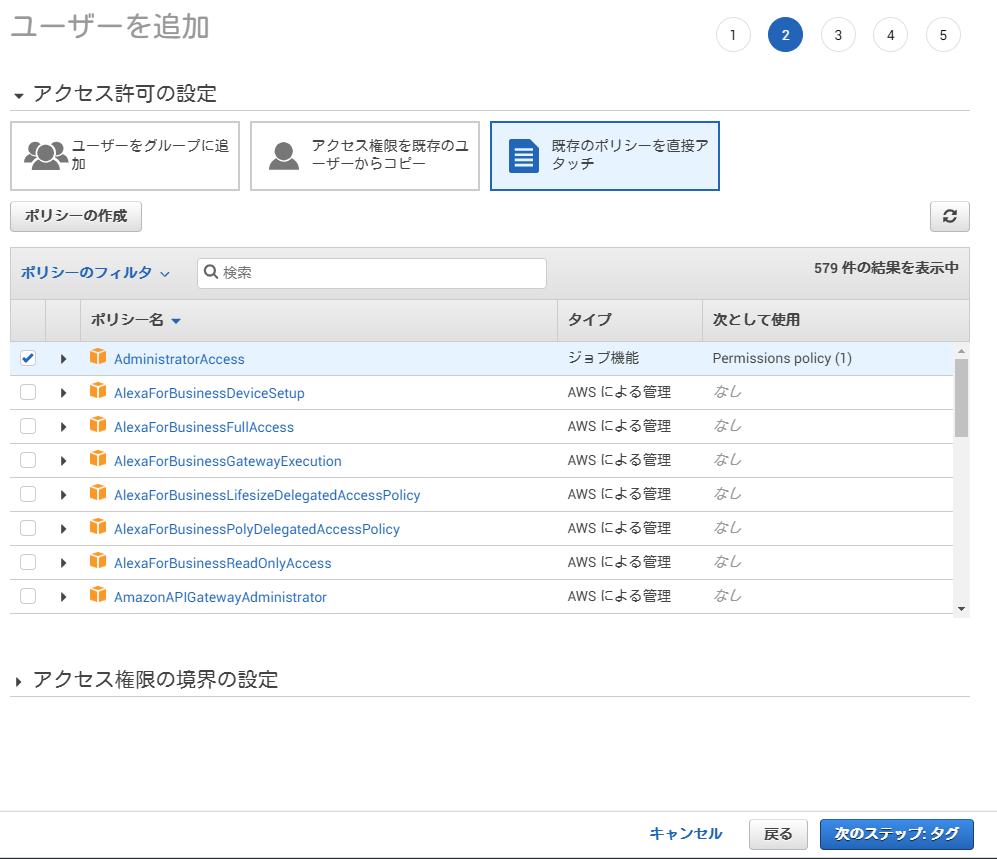
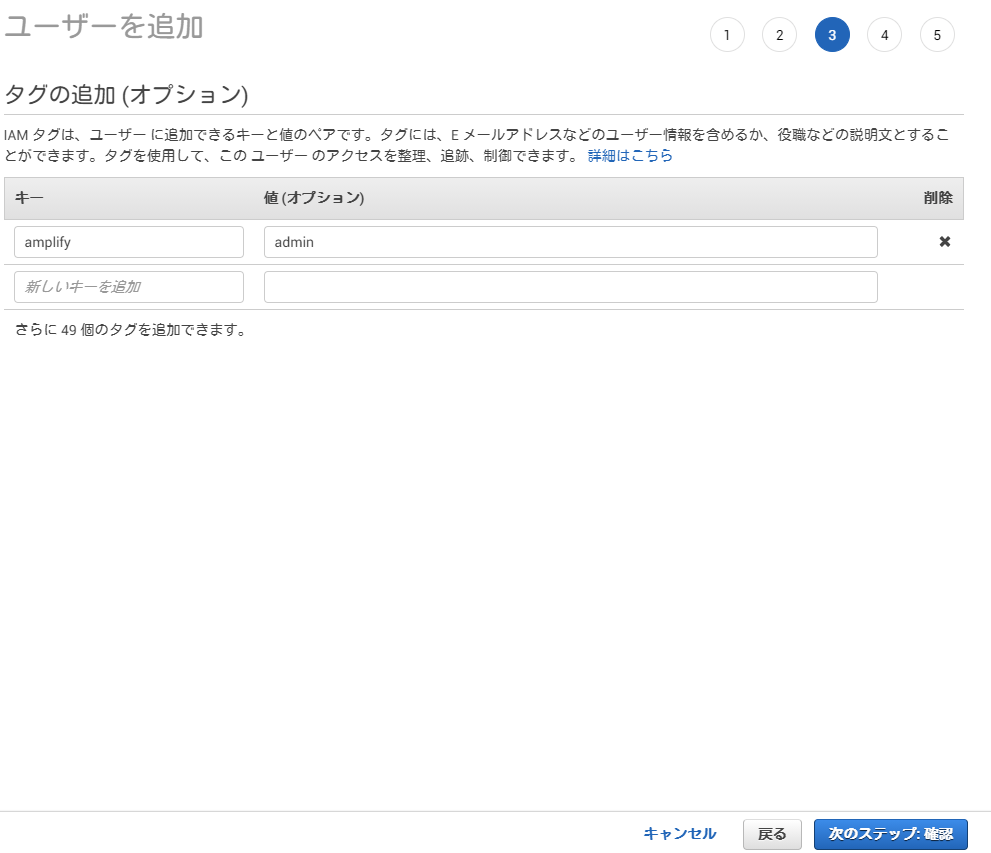
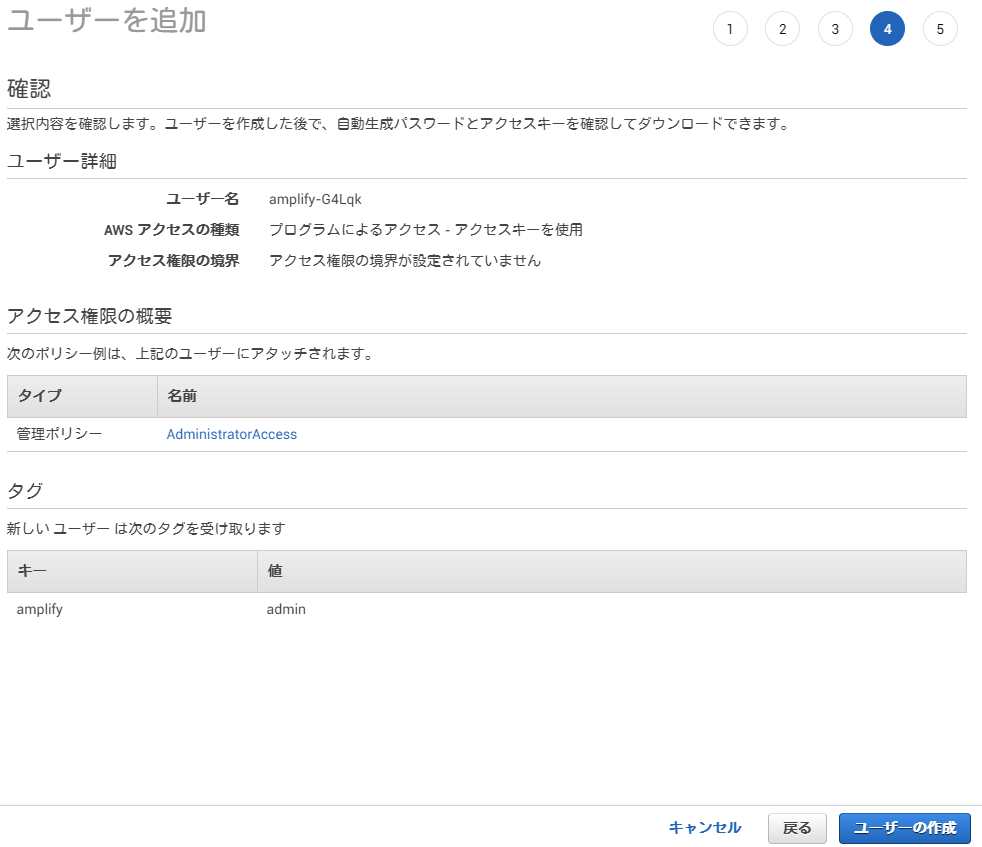
作成画面に遷移するので「次のステップ」をなにも気にせず押していくと、ユーザ作成のボタンが表示されるので押します。
その後、「csvのダウンロード」という項目が表示されるのでクリックしダウンロードをおこない紛失することのないように保管します。
コンソールの対話画面に戻り、Enterを押すと、先ほど作成したIAMユーザの情報をきかれますので、ダウンロードしたcsvを開き「Access key ID」と「Secret access key」の項目をそれぞれコピーし対話画面で貼り付けます。
その後、profile名をきかれますのでここでは「pinpointwebapp」と入力しEnterを押すと「Successfully set up the new user.」という完了メッセージが表示されることを確認します。
[root@dev starter-blog]# amplify configure
Follow these steps to set up access to your AWS account:

Sign in to your AWS administrator account:
https://console.aws.amazon.com/
Press Enter to continue

Specify the AWS Region
? region:  ap-northeast-1
Specify the username of the new IAM user:
? user name:  amplify-G4Lqk
Complete the user creation using the AWS console
https://console.aws.amazon.com/iam/**********************************
Press Enter to continue

Enter the access key of the newly created user:
? accessKeyId:  ********************
? secretAccessKey:  ****************************************
This would update/create the AWS Profile in your local machine
? Profile Name:  pinpointwebapp

Successfully set up the new user.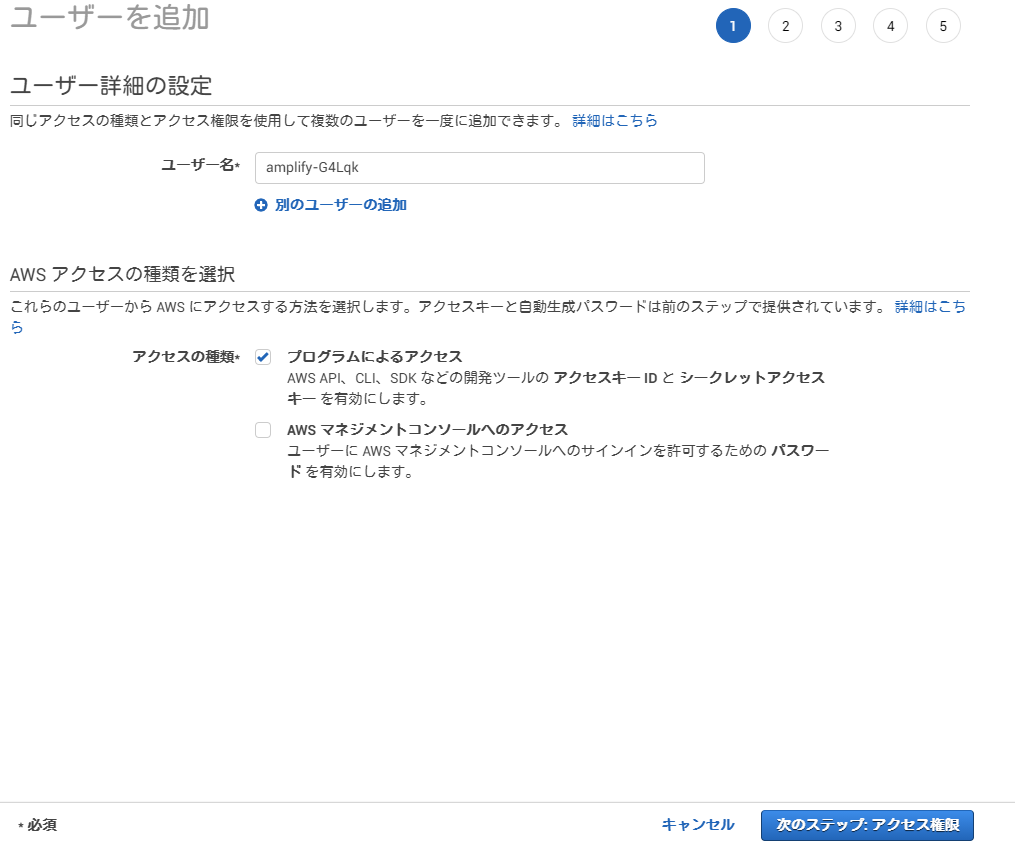
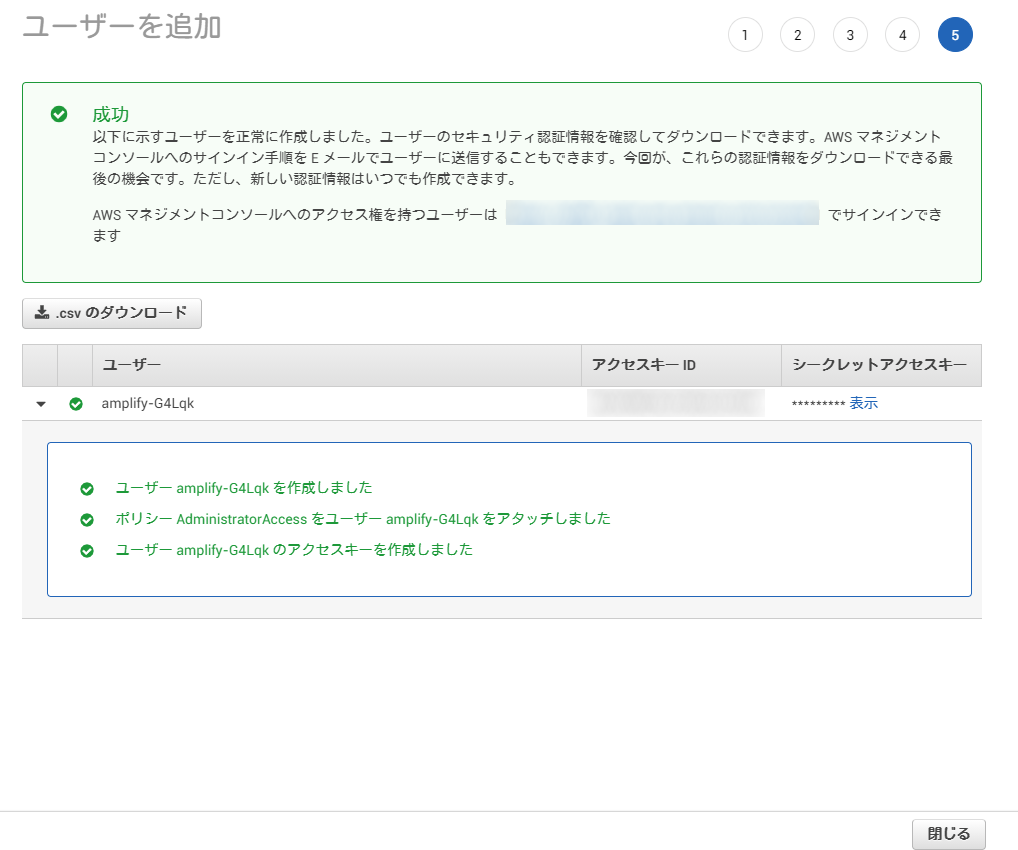
ユーザー作成完了後、アクセスキー IDとシークレットアクセスキーが発行されるので、これをメモします。
シークレットアクセスキーは一度画面を閉じると、二度と確認できなくなってしまうので、忘れずにメモしてください。
もしくは、CSVのファイルをダウンロードし大切に保管します。
Amplifyをプロジェクトに導入する
「starter-blog」直下でamplify initコマンドを実行します。
基本的にすべてデフォルトでよいですが「Enter a name for the environment」の項目は、devやtestを入力してください。
出力に「Your project has been successfully initialized and connected to the cloud!」と出力されることを確認します。
[root@dev starter-blog]# amplify init
Note: It is recommended to run this command from the root of your app directory
? Enter a name for the project starterblog
? Enter a name for the environment dev
? Choose your default editor: Vim (via Terminal, Mac OS only)
? Choose the type of app that you're building javascript
Please tell us about your project
? What javascript framework are you using react
? Source Directory Path:  src
? Distribution Directory Path: public
? Build Command:  npm run build
? Start Command: npm start
Using default provider  awscloudformation

For more information on AWS Profiles, see:
https://docs.aws.amazon.com/cli/latest/userguide/cli-multiple-profiles.html

? Do you want to use an AWS profile? Yes
? Please choose the profile you want to use pinpointwebapp
Adding backend environment dev to AWS Amplify Console app: d1bm2wf6be9z1h
? Initializing project in the cloud...
・
・
・
Your project has been successfully initialized and connected to the cloud!
amplify statusコマンドで下記の様な出力になれば大丈夫です。
[root@dev starter-blog]# amplify status

Current Environment: dev

| Category | Resource name | Operation | Provider plugin |
| -------- | ------------- | --------- | --------------- |
React関連コンポーネントのインストール
[root@dev starter-blog]# npm install aws-amplify @aws-amplify/ui-react
npm WARN deprecated buffer@4.9.1: This version of 'buffer' is out-of-date. You must update to v4.9.2 or newer

+ aws-amplify@3.1.0
+ @aws-amplify/ui-react@0.2.17
added 156 packages from 410 contributors and audited 2627 packages in 62.33s

174 packages are looking for funding
  run npm fund for details

found 48 low severity vulnerabilities
  run npm audit fix to fix them, or npm audit for details
Amplify CLIを用いてPinpointのバックエンドを構築する
「amplify add analytics」コマンドで構築するpinpoint名や認証について設定します。
- Select an Analytics provider Amazon Pinpoint
- Amazon Pinpointを選択します。
- Provide your pinpoint resource name
- リソース名はここでは「pinpointtest」とします。
- Apps need authorization to send analytics...
- 今回は、テストなので認証なしでpinpointを使用可能としますので「Yes」を選択。
[root@dev starter-blog]# amplify add analytics
? Select an Analytics provider Amazon Pinpoint
? Provide your pinpoint resource name: pinpointtest
Adding analytics would add the Auth category to the project if not already added.
? Apps need authorization to send analytics events. Do you want to allow guests and unauthenticated users to send analytics events? (we recommend you allow this when getting starte
d) Yes
Successfully added auth resource locally.
Successfully added resource pinpointtest locally

Some next steps:
"amplify push" builds all of your local backend resources and provisions them in the cloud
"amplify publish" builds all your local backend and front-end resources (if you have hosting category added) and provisions them in the cloud
問題がなければ下記のように「amplify」のディレクトリができあがり、バックエンドを構築するための設定が記述されています。
したがってバックエンドの構築はまだなされていません。
[root@dev starter-blog]# ls -1a ../starter-blog/amplify
#current-cloud-backend
.
..
.config
backend
設定をpushします。
途中いくつか質問されますがすべてデフォルトで構わないです。
無事に成功すると「All resources are updated in the cloud」と出力されます。
[root@dev starter-blog]# amplify push
? Successfully pulled backend environment dev from the cloud.
Current Environment: dev
| Category | Resource name | Operation | Provider plugin |
| --------- | --------------- | --------- | ----------------- |
| Auth | cognitof95f1691 | Create | awscloudformation |
| Analytics | pinpointtest | Create | awscloudformation |
? Are you sure you want to continue? Yes
? Updating resources in the cloud. This may take a few minutes...
・
・
・
UPDATE_COMPLETE amplify-starterblog-dev-33157 AWS::CloudFormation::Stack Thu Sep 03 2020 11:57:31 GMT+0900 (日本標準時)
UPDATE_COMPLETE_CLEANUP_IN_PROGRESS amplify-starterblog-dev-33157 AWS::CloudFormation::Stack Thu Sep 03 2020 11:57:30 GMT+0900 (日本標準時)
? All resources are updated in the cloud
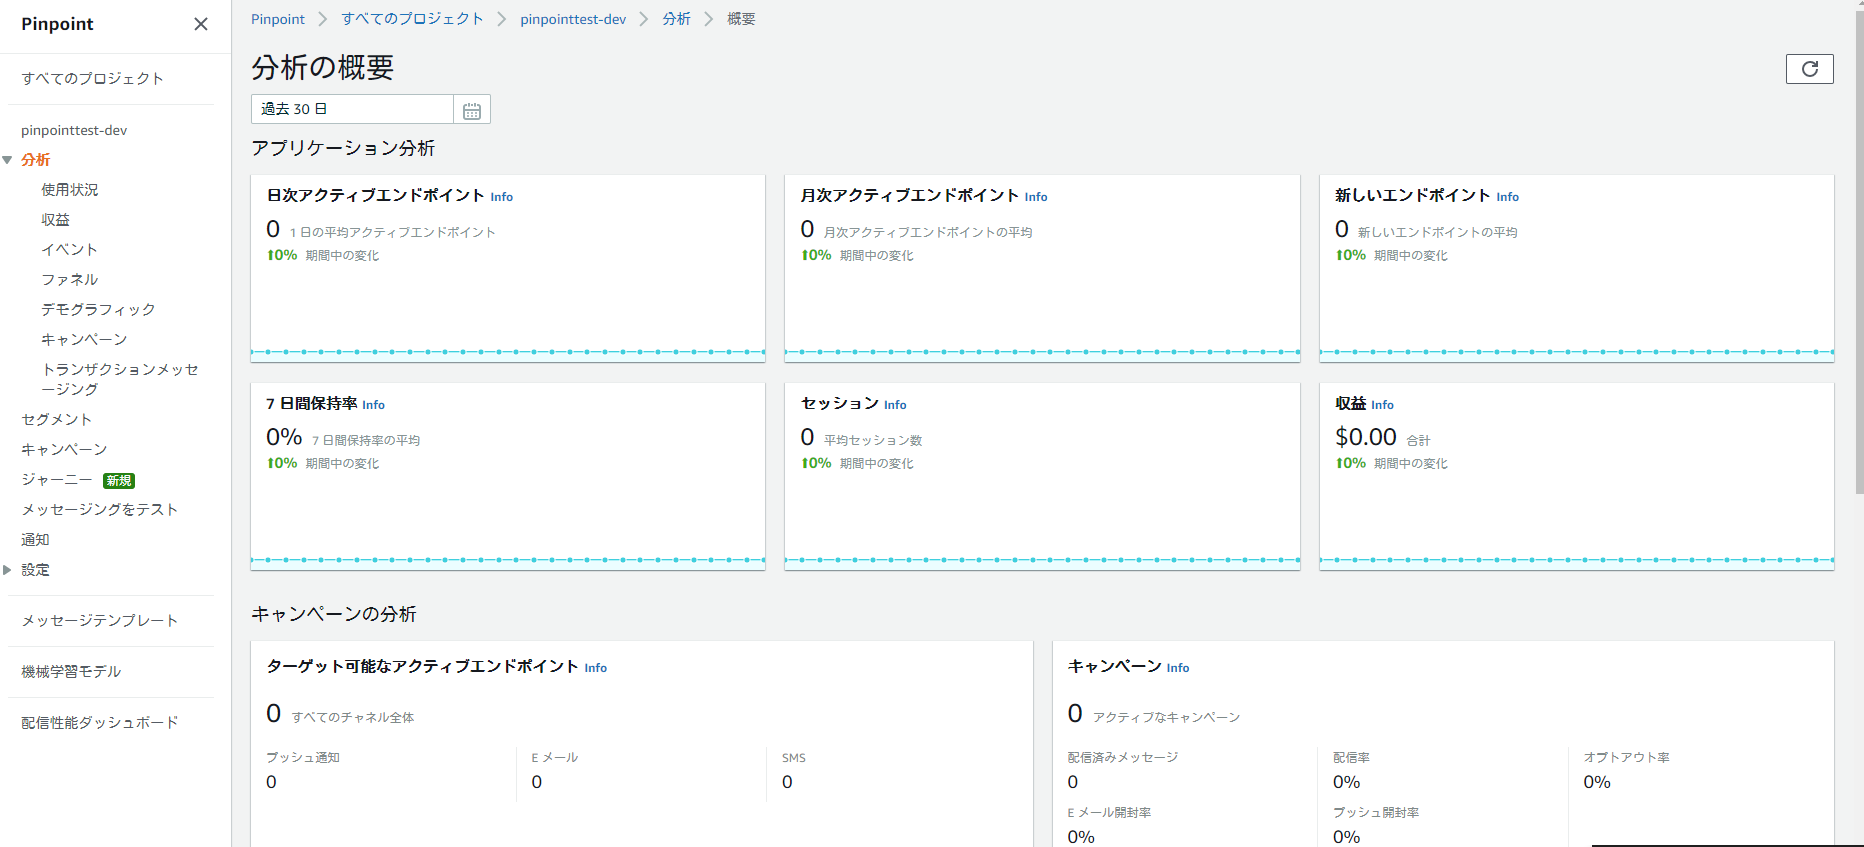
Pinpoint URL to track events https://us-west-2.console.aws.amazon.com/pinpoint/home/?region=us-west-2#/apps/3631c3c4e6074418b25eeb396d9c66cf/analytics/overviewPinpointのAWSマネジメントコンソールURLが発行されます。
リンクをコピーしブラウザのURL欄に貼り付け、下記の様なPinpointの画面が表示されることを確認します。
「src/aws-exports.js」にpinpointのエンドポイントURLが書き込まれていることを確認します。
このファイルはアプリケーションがpinpointへアクセスするのに必要となるファイルですので、手動で書き換えをおこなったり別のディレクトリへ移動等しないよう注意してください。
Pinpointのソースを組み込む
ここでは、Pinpointへデータを転送するコードを追記します。
「npm install aws-amplify」コマンドでAmplify Librariesをインストールします。
Amplify Librariesを用いることで先ほど構築したpinpointにデータを転送する処理が簡単に実装できるようになります。
※実装についてはここでは本記事においては取り扱いません。
アプリケーションのデプロイ
「amplify add hosting」コマンドを使ってデプロイの準備をします。
それぞれ下記のようにきかれますので「Hosting with Amplify Console...」、「Manual deployment」を選択します。
- ? Select the plugin module to execute (Use arrow keys)
- Hosting with Amplify Console (Managed hosting with custom domains, Continuous deployment)
- ? Choose a type
- Manual deployment
[root@dev starter-blog]# amplify add hosting
? Select the plugin module to execute Hosting with Amplify Console (Managed hosting with custom domains, Continuous deployment)
? Choose a type Manual deployment
You can now publish your app using the following command:
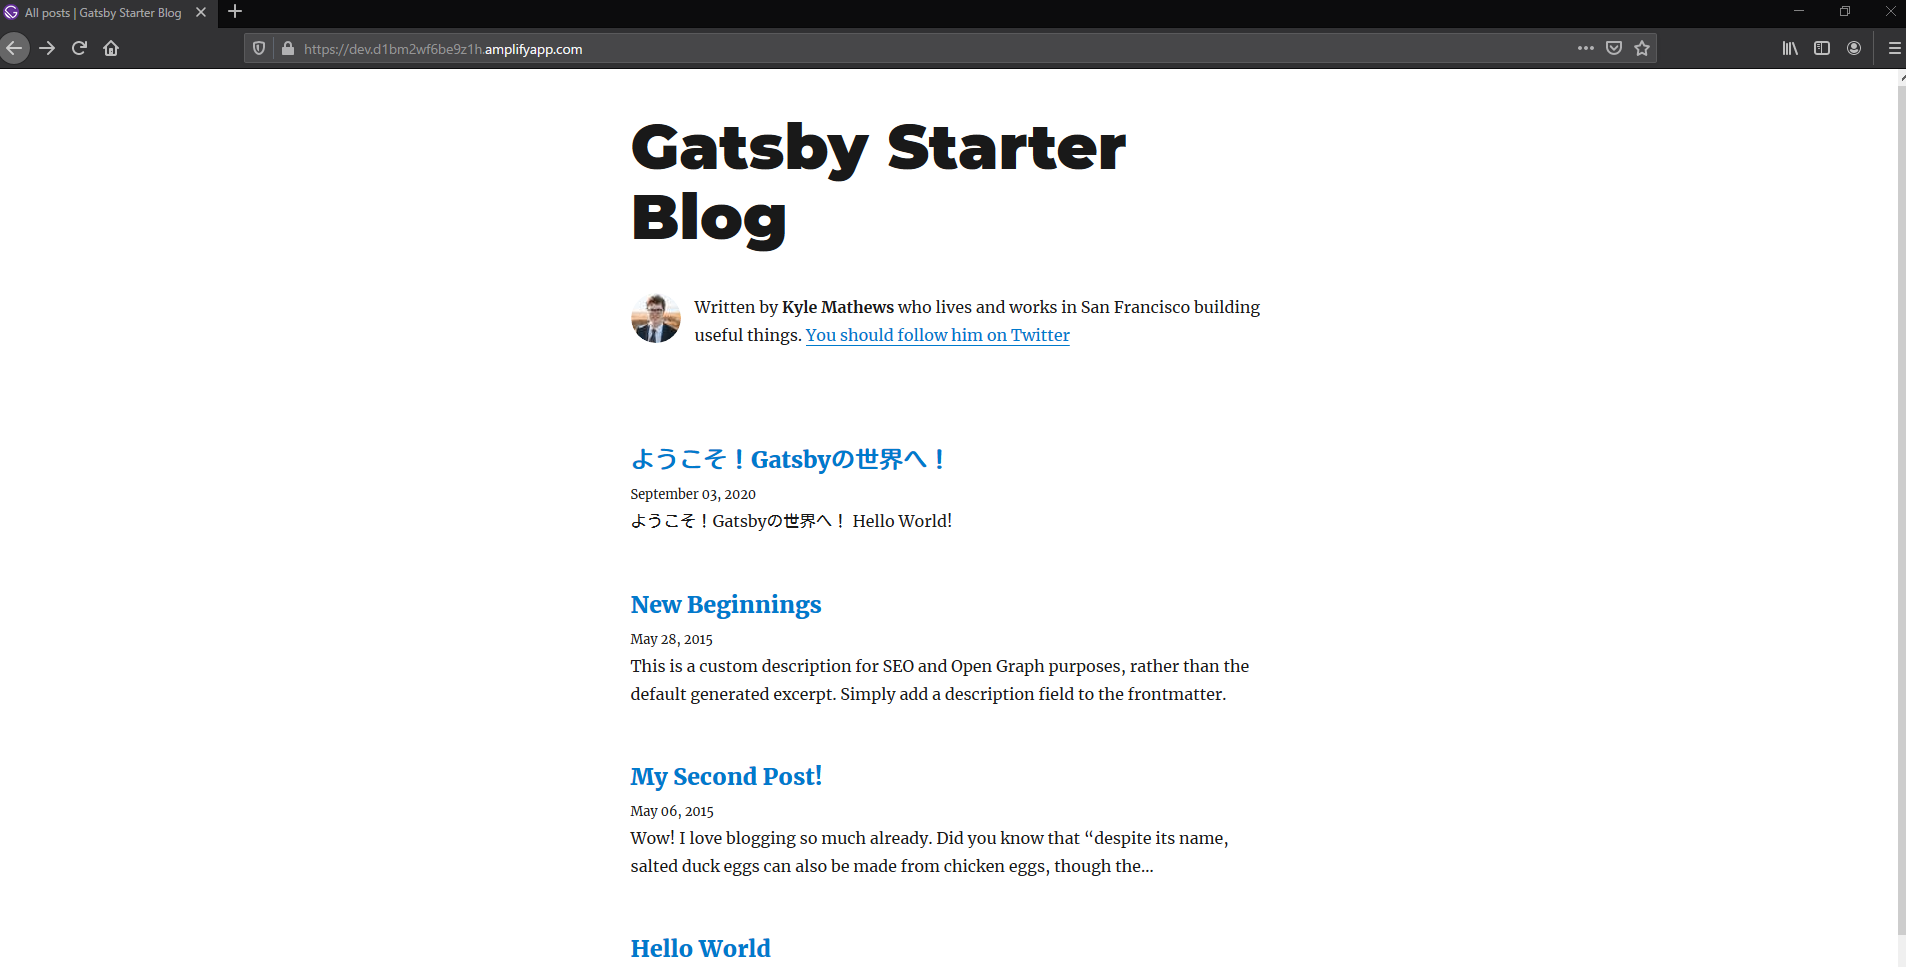
Command: amplify publish「amplify publish」コマンドで実際にAWS環境へデプロイを行います。
完了後、URLが出力されますので、そのURLにアクセスすると今回作成したWEBページを閲覧できます。
[root@dev starter-blog]# amplify publish
? Successfully pulled backend environment dev from the cloud.

Current Environment: dev

| Category | Resource name   | Operation | Provider plugin   |
| -------- | --------------- | --------- | ----------------- |
| Hosting  | amplifyhosting  | Create    | awscloudformation |
| Auth     | cognito1368ae12 | No Change | awscloudformation |
? Are you sure you want to continue? Yes
・
・
・
info Done building in 9.38951964 sec
? Zipping artifacts completed.
? Deployment complete!
https://dev.d1bm2wf6be9z1h.amplifyapp.com
今回、作成したWEBページは下記のような感じになっています。
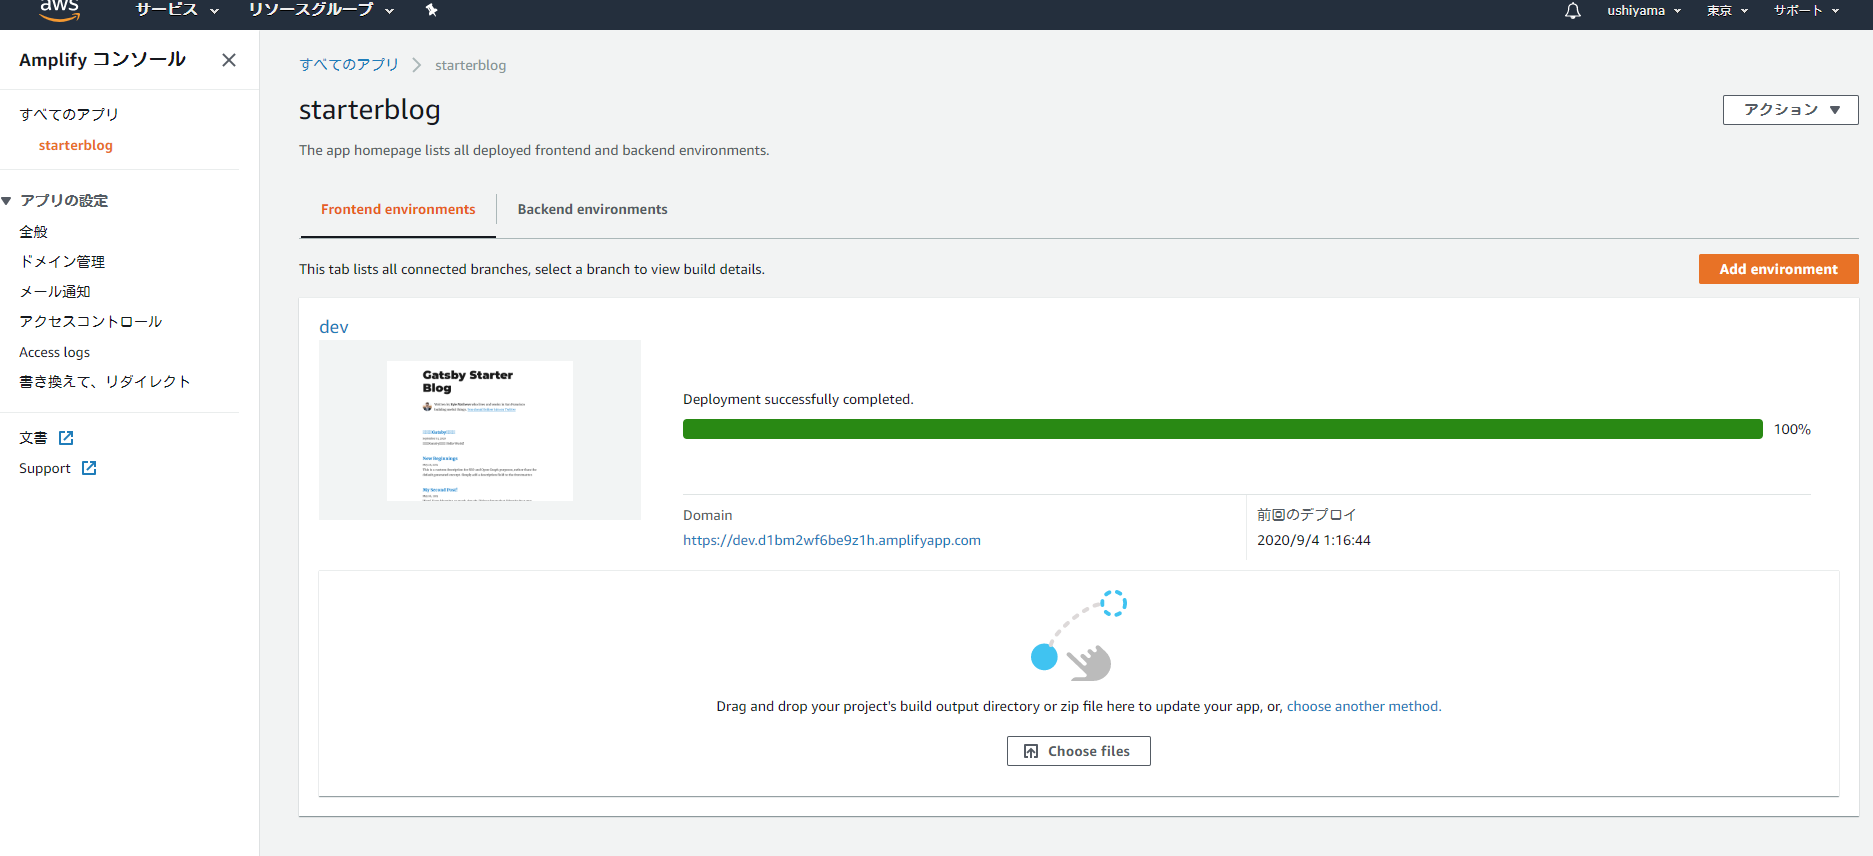
[AWSマネージメントコンソール]→検索欄に[amplify]と入力しAWS Amplifyをクリック→今回デプロイした「starterblog」が表示されるのでクリックすると下記、キャプチャ画像のように「Deployment successfully completed.」と成功していることが分かります。
あとかたづけ
バックエンドが残っている状態では、ごく僅かではありますが費用が発生しますので、アプリケーションの検証が終わったら、「amplify delete」コマンドを実行、バックエンドをすべて削除します。
いくつか質問をされますが、すべてデフォルトを選択します。
- ? Are you sure you want to continue?...
- y ( YES )
[root@dev starter-blog]# amplify delete
? Are you sure you want to continue? This CANNOT be undone. (This would delete all the environments of the project from the cloud and wipe out all the local
 files created by Amplify CLI) Yes
? Deleting resources from the cloud. This may take a few minutes...
Deleting env:dev
? Project deleted in the cloud
Project deleted locally.
再度、AWS Amplifyのコンパネ画面を見ると今回作成した、「starterblog」が削除されていることが確認できます。
まとめ
今回は、AWS AmplifyとAmazon Pinpointを使った静的サイトの構築およびアクセス解析の設定をおこなってみました。
実際問題、AWS側のインフラ面をまったく考えずに自動的に構築してくれるので便利ですね。
次回も、違うサービスとかの解説をしていきたいと思っています。

プロフィール
AWSの設計・構築をメインにおこなっています。
運用・保守をおこなう部署におりましたが、最近、アーキテクト課に異動しました。
日々精進しております。