
こんにちは、最近仕事で使うキーボードをFILCOの茶軸からREALFORCEの静音モデルへ変更したディーネットの山田です。
案件対応で少し触れたAmazon SESからのメール送信についてお届けします。
目次
概要
Amazon SESからメールを送信する経路としては、大きく分けて以下の方法があります。
- SMTPエンドポイント
- API利用
今回は、Amazon SESのSMTPエンドポイントを利用してPostfixからメールを送信してみたいと思います。
EC2からメールを送信する場合は、AWSに対して申請を行ってメール機能を利用されている方も多いのではないかと思いますが、解除申請のやりとりに結構時間を費やすことがあるので、Amazon SESを使えるユースケースであれば利用するのが最適ではないかと考えます。
Amazon SESをプロダクト環境で利用する場合は、サンドボックス解除が必要で結果的にAWSに対して申請を行うことに変わりはないですが、EC2のメール送信緩和申請に比べると比較的通りやすいと思います。
さて、少し話がズレてしまいましたが実際の設定方法を交えながらお伝えしていきます。
設定説明
前提情報
- Amazon SESでサンドボックスが解除された環境が構築済みであること
- このブログでは、ドメイン名に"example.com"を使っていますので適宜置き換えをお願いします
- PostfixがインストールされたLinux環境が構築済みであること
- 設定ファイルのバックアップは適宜行うこと
- 東京リージョン(ap-northeast-1)での利用を想定
事前準備
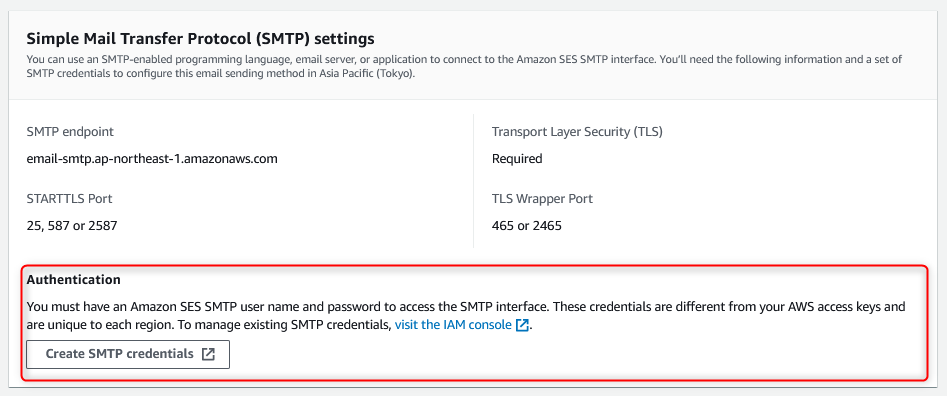
- Postfixに設定するSMTP認証情報を取得します
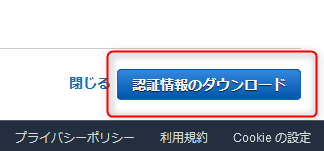
SMTP認証情報を作成


設定方法
Amazon SESを利用する設定をPostfixに入れる
postconf -e "relayhost = [email-smtp.ap-northeast-1.amazonaws.com]:587" \
"smtp_sasl_auth_enable = yes" \
"smtp_sasl_security_options = noanonymous" \
"smtp_sasl_password_maps = hash:/etc/postfix/sasl_passwd" \
"smtp_use_tls = yes" \
"smtp_tls_security_level = encrypt" \
"smtp_tls_note_starttls_offer = yes" \
"sender_canonical_classes = envelope_sender, header_sender" \
"sender_canonical_maps = regexp:/etc/postfix/sender_maps" \
"local_header_rewrite_clients = permit_mynetworks" \
"smtp_header_checks = regexp:/etc/postfix/custom_header"
SMTP認証情報を設定
echo "[email-smtp.ap-northeast-1.amazonaws.com]:587 {SMTPユーザー名}:{SMTPパスワード}" >> /etc/postfix/sasl_passwdAmazon SESのConfig Setを設定する場合
echo "/^From:/i PREPEND X-SES-CONFIGURATION-SET: {Config Set名}" >> /etc/postfix/custom_header※Amazon SESのConfig Setを利用しない場合は不要です。
他によさそうな方法が見つからなかったので、このように設定しています。(マネジメントコンソールから設定できるDefault Config Setは使わない場合です)
送信元アドレスを強制的に書き換える場合
echo "/^.*$/ yamada@send.example.com" >> /etc/postfix/sender_maps設定ファイルの変換とパーミッションを変更
postmap /etc/postfix/sasl_passwd /etc/postfix/custom_header /etc/postfix/sender_maps
chmod 600 /etc/postfix/sasl_passwd /etc/postfix/sasl_passwd.db /etc/postfix/custom_header /etc/postfix/custom_header.db /etc/postfix/sender_maps /etc/postfix/sender_maps.db
chown root:root /etc/postfix/sasl_passwd /etc/postfix/sasl_passwd.db /etc/postfix/custom_header /etc/postfix/custom_header.db /etc/postfix/sender_maps /etc/postfix/sender_maps.db
動作テスト
Bashからmailコマンドで送信する場合
echo "testmail" | mail -s "testmail" -r "yamada@send.example.com" "yamada@receive.example.com"PHPからsendmailを利用して送信する場合
envelope_from(Postfix的にはenvelope_sender)をPostfixで置き換えるように設定している場合
<?php
        $hostname = gethostname();
        $to       = "yamada@receive.example.com";
        $subject  = "[$hostname] smtp test php";
        $message  = "smtp sending test php by denet";
        $headers  = "From: yamada@send.example.com";
        $opts     = "";
        mail($to, $subject, $message, $headers, $opts);
?>
envelope_from(Postfix的にはenvelope_sender)を一切置き換えるように設定していない場合
<?php
        $hostname = gethostname();
        $to       = "yamada@receive.example.com";
        $subject  = "[$hostname] smtp test php";
        $message  = "smtp sending test php by denet";
        $headers  = "From: yamada@send.example.com";
        $opts  = '-f yamada@send.example.com';
        mail($to, $subject, $message, $headers, $opts);
?>
詰まった点や注意する点について
- Amazon SESへ送り込む「エンベロープFrom」や「ヘッダFrom」には、Amazon SESで検証を行ったものでないとエラーになるので注意が必要です。
- 単にPostfixからAmazon SESにリレーする設定を入れただけでは「エンベロープFrom」や「ヘッダFrom」は自動的に書き換わらないのでsendmail等で送出するアプリケーション側で設定が出来ない場合はPostfix側で書き換えてあげる必要があります。
参考サイト
- https://docs.aws.amazon.com/ja_jp/ses/latest/DeveloperGuide/smtp-credentials.html
- https://docs.aws.amazon.com/ja_jp/ses/latest/DeveloperGuide/smtp-connect.html
- https://docs.aws.amazon.com/ja_jp/ses/latest/DeveloperGuide/postfix.html

プロフィール
テクニカルサポートは卒業して、フロントサイドでお客様環境の構築をさせていただいております。
たまに、テクニカルサポートでご対応させていただくことがあるかもしれませんが、その際はよろしくお願いいたします。
インフラ系のエンジニアですが、時々休日プログラマー(Python、PHP)をやっております。